Every physical security setup eventually runs into the same fundamental flaw: local recorders are vulnerable.
You install solid cameras, run the cabling, and plug everything into a network video recorder (NVR) tucked in a back room. Then an intruder breaks in. They spot the blinking box with the hard drives, yank the cables out of the wall, and walk out with your evidence in their backpack. The footage you needed most disappears along with the hardware.
The natural answer is offsite cloud storage. If video uploads immediately as it records, a stolen physical box doesn't matter. But when you look at traditional cloud surveillance options, you run straight into a different problem: aggressive monthly subscription fees that bill you per camera, every single month.
There is a much cleaner, more affordable way to handle offsite video surveillance. Here is how to stream footage directly from standard IP cameras into your own private cloud storage without paying ongoing per-camera platform fees.
The Economics: Per-Camera Cloud Subscriptions vs. Private Storage
Most camera manufacturers push their own proprietary cloud platforms: Reolink Cloud, Ring, Arlo, Hik-Connect, or Dahua DMSS. They make signup easy, but the business model is built to drain your wallet over time.
1. The Per-Camera Pricing Trap
Vendor clouds bill on an individual camera basis. Paying $5 to $10 a month sounds harmless when you have one doorbell camera at home. The math falls apart the moment you need real coverage:
| Surveillance Setup | Typical Vendor Cloud ($6/mo/cam) | Private Cloud (Rilavek + Backblaze / R2) | Annual Savings |
|---|---|---|---|
| 4 Cameras (Small office or cafe) | $24 / month ($288 / year) | ~$0 to $5 / month ($0 to $60 / year) | ~$230 / year |
| 8 Cameras (Retail shop or auto garage) | $48 / month ($576 / year) | ~$10 / month ($120 / year) | ~$450 / year |
| 16 Cameras (Warehouse or boutique hotel) | $96 / month ($1,152 / year) | ~$10 to $15 / month ($120 to $180 / year) | ~$970 / year |
With private cloud storage, you pay for raw data volume, not the count of lenses pointing at your doors.
2. The Arbitrary 30-Day Retention Cap
Most commercial camera subscriptions delete your video after 7, 14, or 30 days. If an insurance dispute, worker compensation claim, or customer liability incident surfaces 45 days after the fact, the video is permanently gone. Paying vendors to retain clips for 90 to 180 days either carries premium tier pricing or simply isn't an option.
In your own S3 or Backblaze bucket, keeping 90 days of motion clips costs pocket change.
Why Cameras Can't Talk to Cloud Storage Natively
If private cloud storage is so much cheaper, why isn't everyone doing it already?
Because standard IP cameras don't speak modern cloud APIs. Security cameras from Hikvision, Dahua, Reolink, Axis, and Amcrest run compact firmware on low-power chips. They know how to stream video across a local network using RTSP, and they know how to deliver files using FTP (File Transfer Protocol).
What they cannot do is sign Amazon AWS SigV4 cryptographic headers, negotiate complex OAuth handshakes, or manage multipart HTTP upload buffers.
Meanwhile, cloud storage providers (AWS S3, Cloudflare R2, Backblaze B2) only accept HTTPS API requests. They do not run FTP servers.
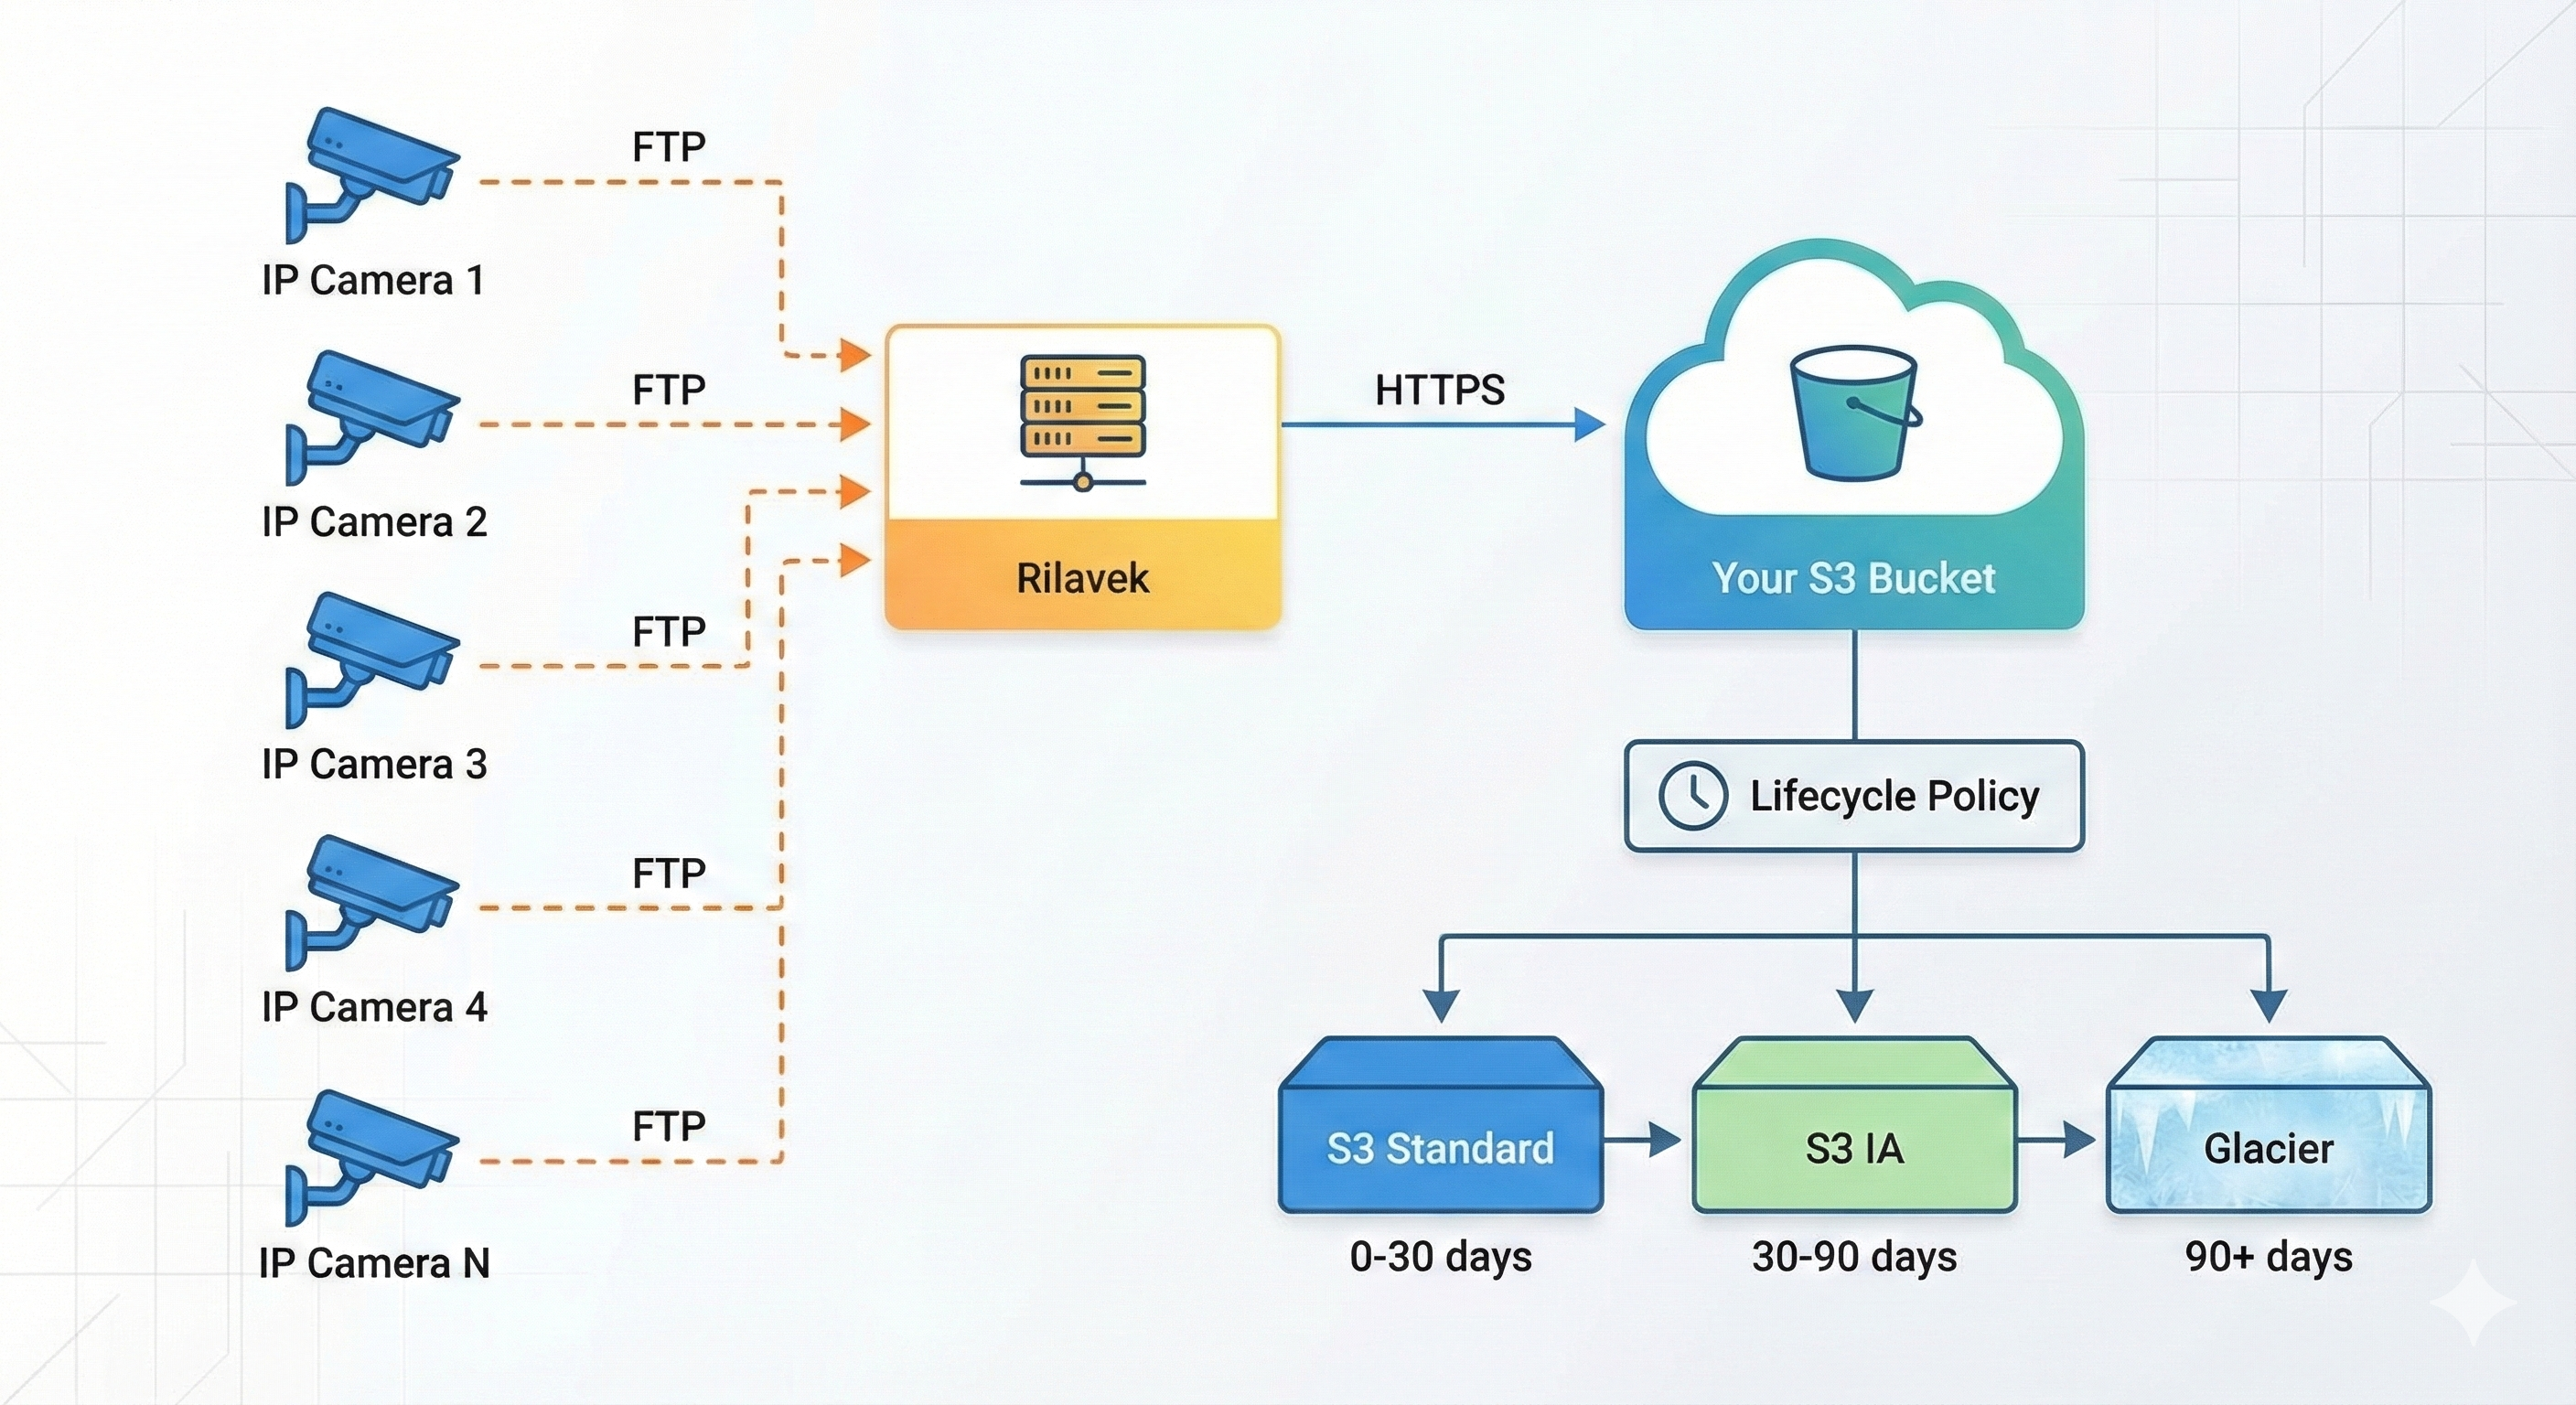
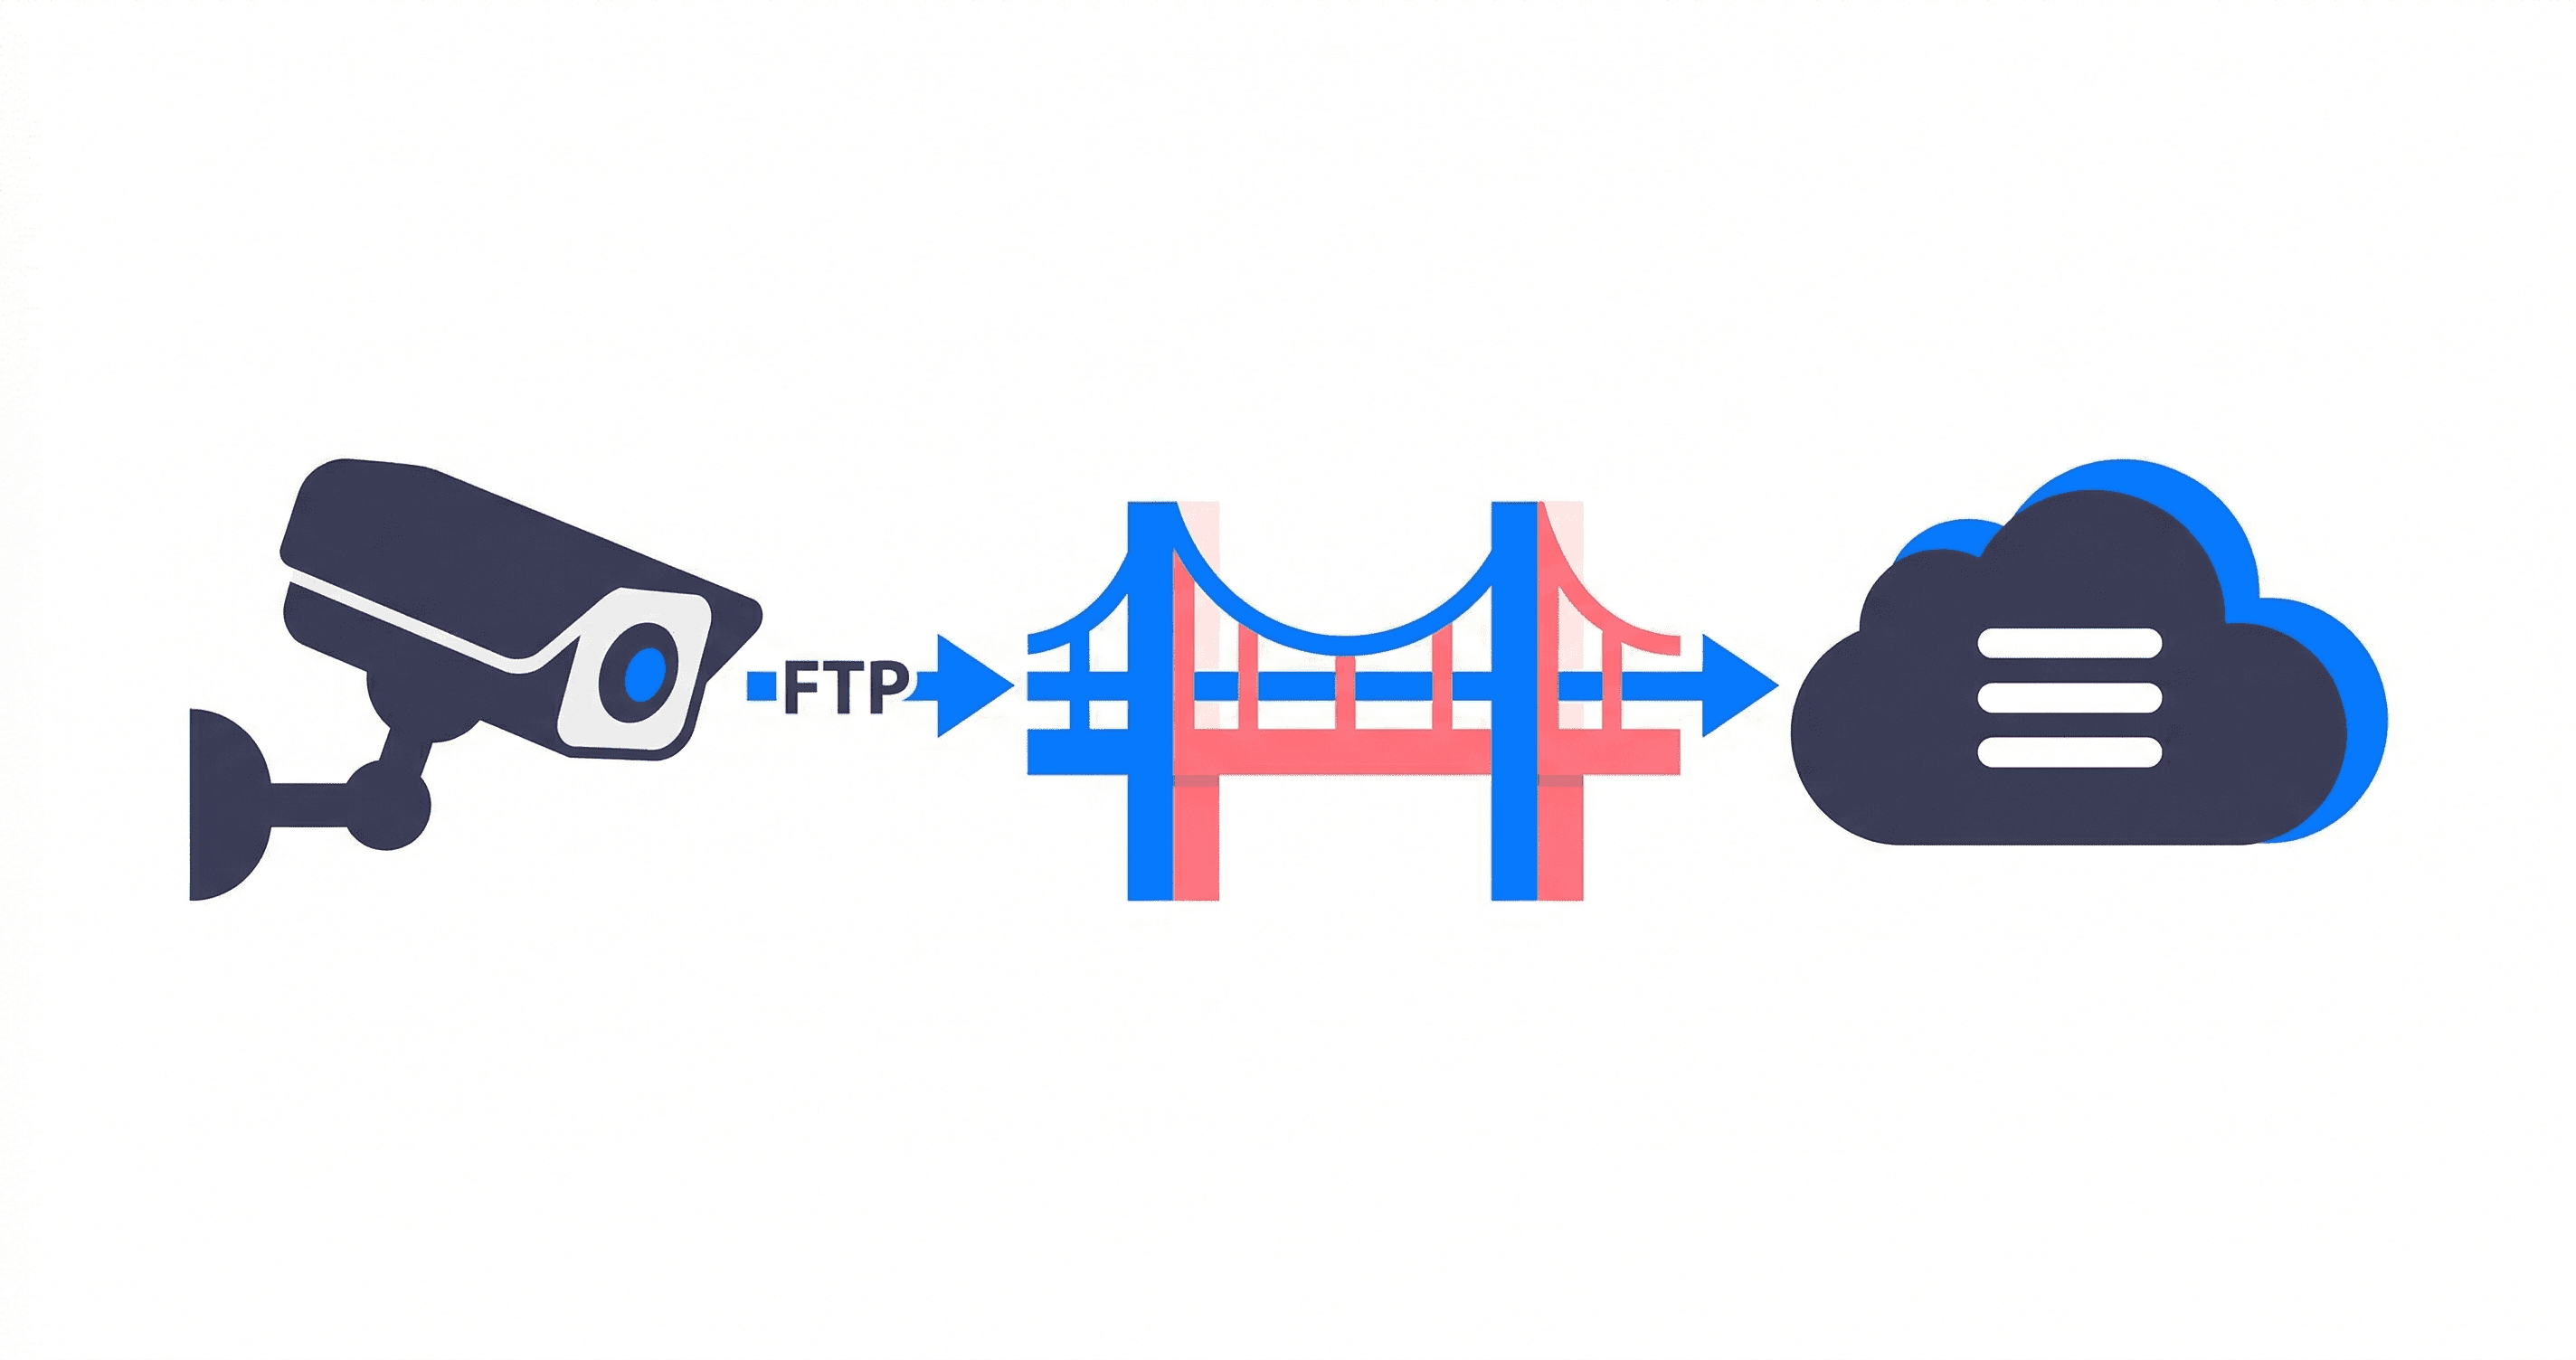
Rilavek bridges this gap. It provides a standard, dedicated FTP/FTPS endpoint for your cameras. When a camera detects motion and uploads a clip or snapshot, Rilavek streams the incoming bytes directly into your private cloud bucket in real time. The video never rests on intermediate server disks.
Multi-Location Surveillance: One Bucket, Zero Collisions
For operators managing multiple physical sites (such as two retail shops and a central inventory room), organizing footage usually requires buying separate NVRs or juggling separate cloud logins.
With a central streaming bridge, every camera across all your locations can point to a single Pipe. You use unique Sender usernames to route incoming files into cleanly isolated directory structures automatically:
| Physical Location | Camera Position | Sender Username | S3 Destination Path |
|---|---|---|---|
| Downtown Store | Cash Register | downtown_cashier@p_surveillance | /downtown_cashier/ |
| Downtown Store | Back Delivery Door | downtown_backdoor@p_surveillance | /downtown_backdoor/ |
| Westside Branch | Customer Entrance | westside_entrance@p_surveillance | /westside_entrance/ |
| Warehouse | Loading Bay 1 | wh_loadingbay1@p_surveillance | /wh_loadingbay1/ |
| Warehouse | Inventory Racks | wh_inventory@p_surveillance | /wh_inventory/ |
Every site operates independently. If one location suffers an internet outage or a power cut, other locations keep streaming uninterrupted. Everything settles into a single, centralized S3 bucket with one consolidated lifecycle policy.
Footage Retention Strategy: Keeping 90+ Days for Pennies
Video files add up over time. If you leave full-resolution clips in standard hot storage indefinitely, monthly costs will creep upward.
The solution is an automated storage lifecycle policy. You configure your bucket to transition older footage through colder storage tiers automatically:
- Days 1 to 30 (Hot Tier / S3 Standard): Immediate playback for recent incidents. This is where 99% of your daily footage reviews happen.
- Days 31 to 90 (Infrequent Access): Cost drops by roughly 50%. The video remains instantly accessible if an incident from last month needs checking.
- Days 91 to 365 (Glacier Flexible or Deep Archive): Cost plummets to under $0.004 per gigabyte. Retrieval takes a couple of hours, which is completely fine for formal insurance or legal inquiries.
- Day 365+ (Automatic Expiration): Old files delete automatically, keeping storage clean and preventing liability risks from holding outdated footage.
If you use Backblaze B2 or Cloudflare R2, storage starts at a flat $0.006/GB with zero egress fees, making cost calculations completely predictable without needing complex tier transitions.
Practical Network Hardening for Camera Installations
IP cameras are notorious for neglected firmware security. To run an offsite surveillance pipeline safely, follow three straightforward network rules:
1. Put Cameras on Their Own VLAN
Never let security cameras live on the same subnet as your office computers, card payment terminals, or guest Wi-Fi. Create an isolated surveillance VLAN so that a compromised camera cannot reach internal business machines.
2. Lock Down Outbound Firewall Rules
Set your router or firewall to block all inbound WAN traffic to the camera VLAN. For outbound traffic, allow only connections to your bridge endpoint on port 21 (and passive data ports). Block all other outbound traffic so cameras cannot phone home to overseas cloud servers or communicate with external IP addresses.
3. Use Micro-SD Cards as Local Buffers
What happens if your internet provider drops connection for two hours?
Pop an inexpensive high-endurance micro-SD card into each camera's onboard slot. Most cameras from Reolink, Dahua, and Hikvision automatically buffer recordings locally when their FTP connection is unavailable, then flush those queued clips to the cloud the moment the internet comes back online.
Setting Up Your Cameras in 3 Steps
Configuring your cameras takes about five minutes per unit through their standard web browser admin interfaces:
- Create Your Pipe and Senders in Rilavek:
Connect your S3, R2, or B2 bucket to a Pipe. Create a unique Sender for each camera (for example,front_door) and note the generated password. - Enter FTP Settings in Camera Firmware:
Log into your camera's local web console, navigate to Network → Advanced → FTP, and fill in the fields:- FTP Server:
ftp.rilavek.com - Port:
21 - Username:
front_door@p_yourpipeid - Password: Your Sender password
- Directory:
/
- FTP Server:
- Arm Motion Recording:
In the camera's Storage or Event menu, set the recording trigger to FTP upload on motion detection. Save, trigger a quick test walk in front of the lens, and verify the video file appears in your bucket.
Summary & Next Steps
Offsite video surveillance shouldn't require paying hundred-dollar monthly subscriptions or relying on local recording boxes that can be stolen during a break-in.
By streaming your camera feeds through a lightweight bridge directly into your own private cloud storage, you get true data ownership, extended retention for liability defense, and massive cost savings that grow with every camera you add.
- Get started free on Rilavek (includes 10GB/month of streaming, no credit card required).
- Estimate Your Bandwidth & Storage: Calculate exact monthly costs for your camera setup with our interactive CCTV Cloud Storage Calculator.
- Technical Architecture Deep Dive: For protocol comparisons, RTSP vs. FTP analysis, and AWS Storage Gateway cost teardowns, read our CCTV Camera to S3 Architecture Guide.
Enjoyed this guide?
Share it with your network to help others scale their data pipelines.